Kentwell costuming – The Petticoate – Children version
Just remind that for costume making I will be following the tudor costume page fairly slavishly the tudor tailor book and nearer the time costume elves [!] for the difficult bits I am currently not a re-enactor, but have visited Kentwell and we are really keen as a family to join the tudors. I plan to make a shift and petticoat for each of us girls, a shift for DH by Xmas, and 2 shifts each before the first open day in feb [ie majority of linens, at my own risk as may well not be accepted] this is because there is a huge amount of sewing to be done, and i think if you are any more than 2, to try and fit it all in after acceptance is really a tall order and hard work.
This means that the steps detailed here are not originating from my brain, but the tudor costume makers, though some of the mistakes and how to avoid unfortunately did :blush: . The tudor costume page has unfortunately got some non-working links, and since it was last updated a fair while ago there are a few non-completed bits. This wasn’t a problem for petticoates though. Nothing detailed here seems particularly at odds with costume notes from a prev year.
Anyone thinking of making clothes for re-enactment, please check with your group the ‘rules’ on materials, colours and look. different tudor years have different styles – tho less so for poor, especially poor kids. following these notes does not guarentee acceptance of clothing by Kentwell or any other group, but may help a total novice such as myself. I had never made any clothes before these – a hint of my novicitude. I wrote this initially in Sept 2011, but have added in the things that had I had known I would have done differently – mostly in italics ![]()
The Materials:
I have used a drabbish blue 100% pure linen shirting material. I have used cotton thread though, even if linen more authentic in a near matching greyish colour. I washed it and dried it as recommended
*it has to be said, that there isn’t necessarily huge evidence for coloured linen petticoats in a lot of tudor texts, there is definitely evidence for lighter red wool ones tho, and red is a good colour for a petticoat. If making in advance and playing safe, an unbleached linen or red wool, and then you can dye the linen if it is deemed acceptable by the kentwell year you go to, or by the tudor group you join. Also, that this prob should have a bodice on it. so it prob is a half kirtle in linen – yes, the terminology for me still goes above my head ![]() however, currently a petticoat/half kirtle call it what you will in coloured linen is acceptable for kentwell as an underlayer. It is not essential but useful so you can lift up your woolen kirtle so it doesnt get covered in mud*
however, currently a petticoat/half kirtle call it what you will in coloured linen is acceptable for kentwell as an underlayer. It is not essential but useful so you can lift up your woolen kirtle so it doesnt get covered in mud*
The Disclaimer[s]:
the only bit of clothing i have ever otherwise made is a victorian pinny last year with sewing machine. I am a complete novice with any kind of stitching at all. I find it near impossible to follow a pattern and have a strong allergy to straight lines, accurately measuring and cutting and all those other things that make successful dressmakers. I have never been to Kentwell as a re-enactor, so my attempts are as yet unapproved at costume check! ie follow my lead at your peril ![]()
Having said that, the Tudor costume appears to have had all her designs accepted at Kentwell, so I am hopeful. So, opening the page to petticoats…
[clearly I did pass costume check ![]() . but what i would now like to add having done Kentwell, is that really really reinforce the sewing to the waistband, if hand sewing double the thread, if machine go over twice! and for your childr make no longer than midcalf for they will always be treading on it. if you are aiming for room to grow, have a small hem, but 4-5 inches above do a tuck of about 2-3 inches of material ]
. but what i would now like to add having done Kentwell, is that really really reinforce the sewing to the waistband, if hand sewing double the thread, if machine go over twice! and for your childr make no longer than midcalf for they will always be treading on it. if you are aiming for room to grow, have a small hem, but 4-5 inches above do a tuck of about 2-3 inches of material ]
Measuring Up:
I read the rectangle bit and thought hmmm so what does that mean in terms of widths and lengths for a child then? my material was 50inches wide and my child 23inches all round and 36 inches to just above ankle. so I decided to go for the version where it says have 2 rectangles so they were each 50 inches wide and 40 inches long – ie a multiplication factor of 4 of the waist measurement. *I think this is quite generous now, and think you could prob get away with a x2.5 -3 facto with a maximum of 1m each.*
So having made that decision for SB, I decided to do the version at the bottom of the tudor costume page which allows for pregnancy etc. obviously at 10 this isn’t n issue [phew!] but did want to factor in some growth.
Cutting and Hemming the Rectangles:
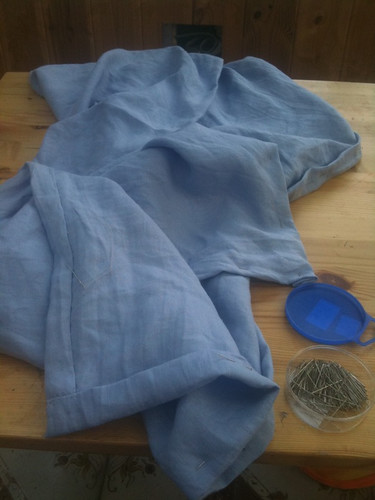
I didn’t cut the straightest of lines, but hemming made the rectangles pretty acceptable standard, and they did appear to be of similar length and width also – always a relief! I did decide to handstitch all, and go with the suggested option of hemming the seams and then whipstitching later, though a bit tempted by run and fell for the imaginative title of a stitch ![]() . *hemming and whipstitching a good option – it allows you to add panels easily later, but the hemming keeps the linen edge ‘hidden’ and as it loves fraying, this is a good thing
. *hemming and whipstitching a good option – it allows you to add panels easily later, but the hemming keeps the linen edge ‘hidden’ and as it loves fraying, this is a good thing ![]() this is called a finished seam I believe*
this is called a finished seam I believe*
Proudly looking at my completely hemmed rectangles I re-read the instructions and realised that it hasn’t mentioned hemming yet. So, to do again, I would still hem at this point, but the short sides only ![]() Definitely do not hem what will be the top. Although nice and neat, think that the waistband is now fairly bulky due to all the material stuffed in it. Oh, I think i forgot to say in the disclaimers that I also have an aversion to undoing and redoing unless absolutely have to. I have decided this top hem is ‘spare length for the future’ though imagine i will never unpick it! A further band round the bottom would be easier. *and actually in keeping with period – TBH placket a good idea for waist stretching, but really don’t be bothered about length for the future – tudors not into big hems as materials cost money, and the skirt can get shorter over the year, and eventually put a band around the bottom *
Definitely do not hem what will be the top. Although nice and neat, think that the waistband is now fairly bulky due to all the material stuffed in it. Oh, I think i forgot to say in the disclaimers that I also have an aversion to undoing and redoing unless absolutely have to. I have decided this top hem is ‘spare length for the future’ though imagine i will never unpick it! A further band round the bottom would be easier. *and actually in keeping with period – TBH placket a good idea for waist stretching, but really don’t be bothered about length for the future – tudors not into big hems as materials cost money, and the skirt can get shorter over the year, and eventually put a band around the bottom *
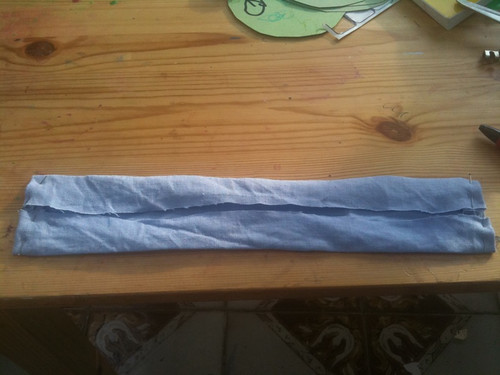
Preparing the Waistband:
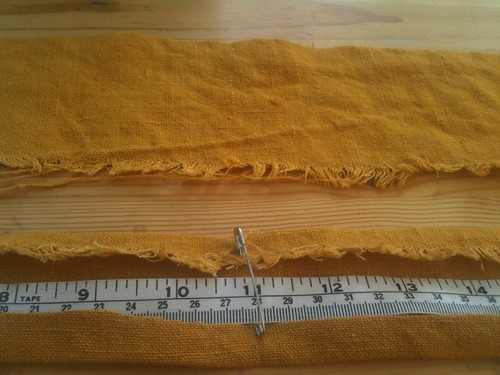
i did actually measure this a lot more carefully! I have 2 waistband halves: the front and the back. each was measured out at 14 inches by 4 inches, with the plan to have a 12 inch by 1 inch band at the end. however, having prepared one, I thought that I would make the other so it was 13 by 1 inch to give a bit more breathing room after putting the 2 12 inch ones around sb. SInce i had included plenty of hem allowance in the cutting, this was very easy. [the costume notes suggest making your waistband 5” longer, i am not sure why? or is it to waistband the placket? I didn’t anyway, and it seems to have worked nicely.
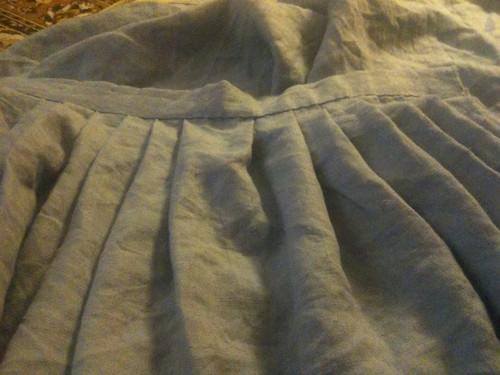
I did all the folds as in the tudor costume page, and then had a crisis and couldn’t overcome my natural disinclination to use an iron. Linen seems to fold well anyway. I did, however, mark the pleats with pen as that seemed very sensible. Due to the voluminous amount of material [hence suggesting a x3 multiplier is more than adequate, and in truth a max of 2m all round] i spaced the pleats at 2cm.
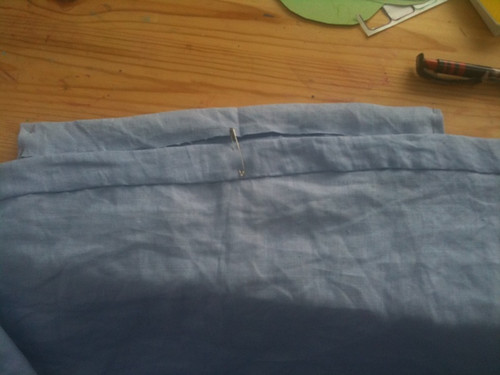
Pinning the Pleats:
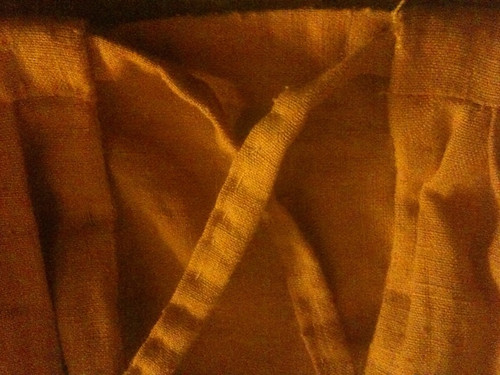
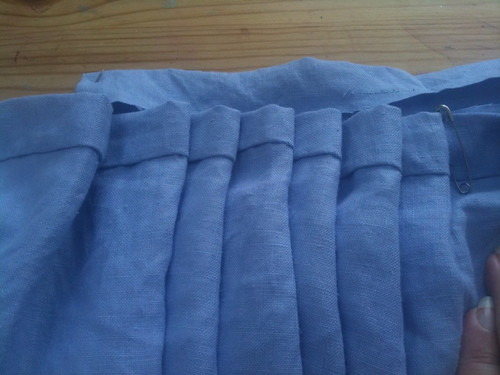
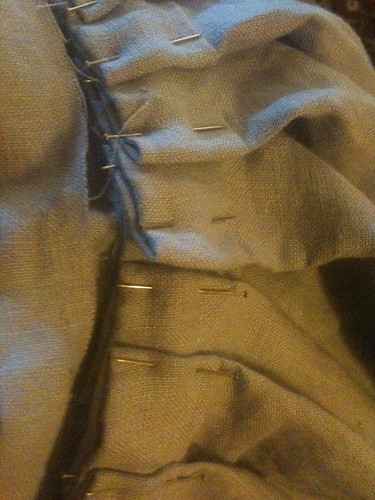
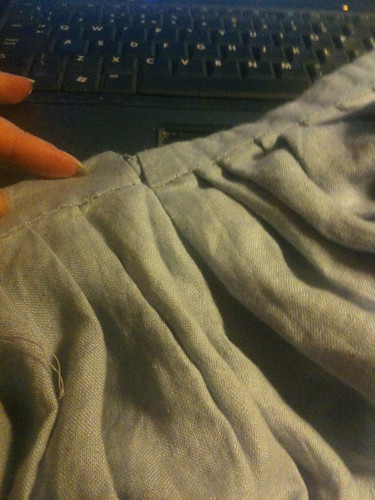
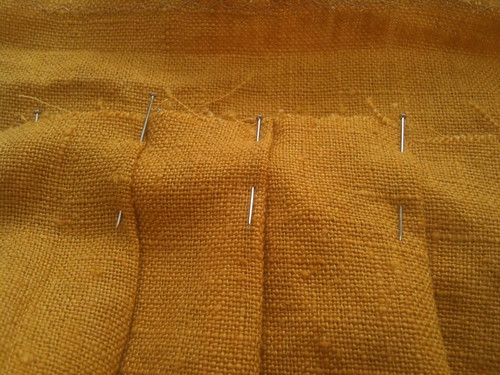
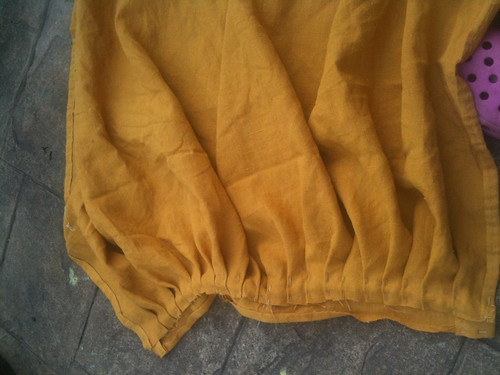
You can see in the picture above I safety pinned for reference the centre of my waistband and the centre of the skirt together before starting pinning so all was even. I had knife pleats going away from a central point and each pleat went back to the previous one before going ahead the next 2cm ie 4cm forwards and 2cm back, 4 cm forwards etc to space at 2cm. this left me with 3inches of free material on each side of the front 12 inch waistband, which are the plackets for the extendible nature of the petticoate. For the rear 13 inch waistband I did some minor bodging so that it fitted. Tudor petticoats at this time have a central unpleated section at the front and knife pleat all the way around to the back, where they meet as a box pleat.
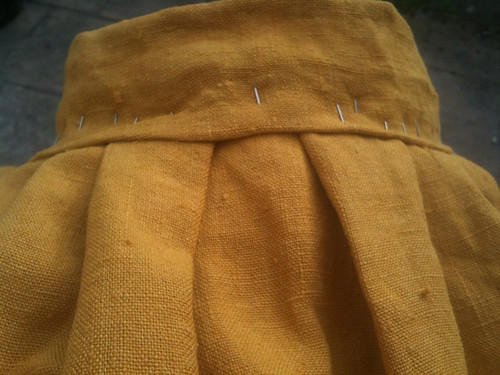
When I pinned these down, I pinned both the forward turn of the pleat and also the backwards return. please have all your pinheads to the upper rather than heads down. It will make it a lot easier to remove them after stitching!
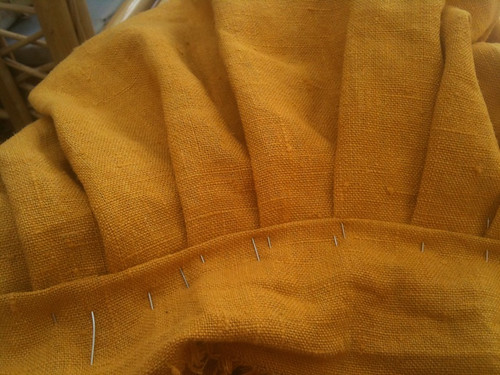
I then looked critically at both bits, decided I was happy, draped them round a v complaining SB even tho pins were outside as it did look scary [30 pins in each bit] and made sure that it seemed a nice tight fit as since it has extension room, didn’t want it to start too loose! Realised this style accentuates her slimness and felt a pang of jealousy [must do better at diet] . You can see the will-be-placket in one of the pictures
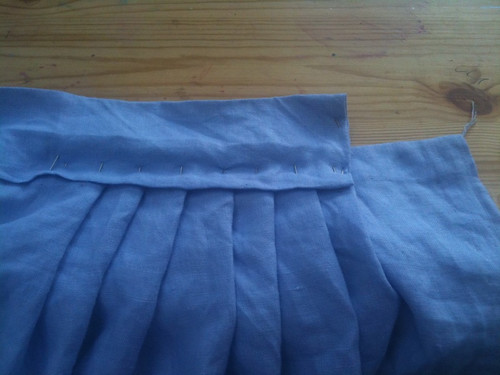
Sewing the Skirt to the Waistband:
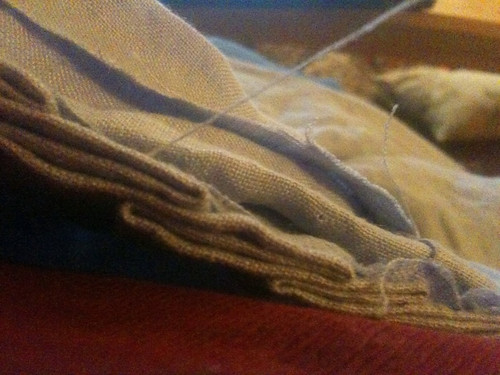
I have to say that here I am not entirely sure I have followed instructions. i have hemmed the waistband onto the pleats on the outside as I think it suggests, and then decided just to hem the other side might be a bit weak, especially for a child who will run and trip up etc. SO after hemming the good side, on turning back over I did a running stitch between the pleats and the fold up of the waistband, so invisible from the outside, but hopefully a bit of extra strength.
I removed all the pins – including those lost in the folds because their heads were down – ouch – and hemmed the inside view waistband to pleats. It does look v neat and good [for me] and I am pleased. The waistband is chunky though, due to the unfortuate hemming of all sides thing. Might not be a bad thing though, as won’t ruckle up so much. ou cans see the thickness and the sewing through in one of the pictures.
- Whipstitching the Sides:
This was a nice easy job. from the internet it looks like whipstitching is the same as in patchwork, so that is what i have done all up both seams to the very top, so the placket on each side – which is effectively straight rather than placket shaped ![]() – is joining the front and the back. It has 3 inches expansion and SB could easily slip over her hips [and when she can’t i will just free the placket from the back…
– is joining the front and the back. It has 3 inches expansion and SB could easily slip over her hips [and when she can’t i will just free the placket from the back…
i would have been delighted except… it is about 1.5 inches from being a snug waist fit ![]() ie that extra inch wasn’t required. Ho Hum. She has a 6 month to grow before trying it on for real, so maybe will need some of that inch. The length is just right for now, as she is bound to have a couple more inches of height.
ie that extra inch wasn’t required. Ho Hum. She has a 6 month to grow before trying it on for real, so maybe will need some of that inch. The length is just right for now, as she is bound to have a couple more inches of height.
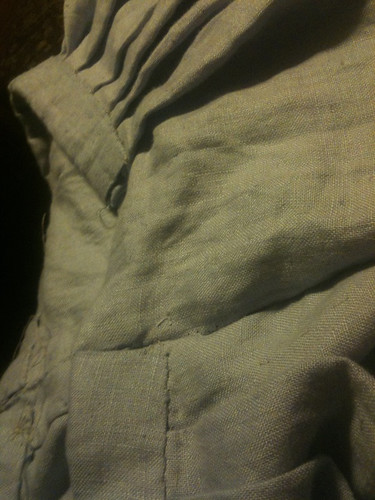
you can see the placket open and closed above
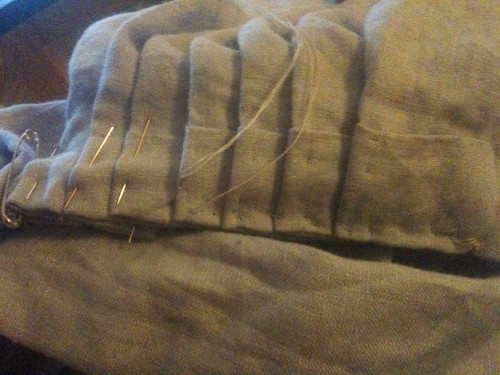
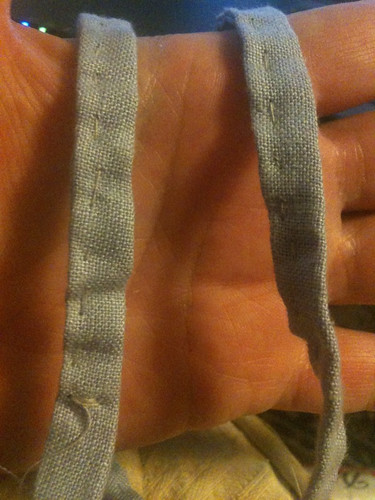
- Making the Linen Ties:
I decided i would have them 1cm wide so cut 2 inches wide and the length of the waistband long. Initially I did it as per the tudor Costume, sewed inside out and attempted a pull through, it did fine till half way when my thread snapped.
I decided to bail out, and did the fold as per waistband [fold each edge into the middle] and did a neat running stitch all along. I think it looks fine . I have then sewed them onto the waistband, recessed along by 3 inches, and since these stitches would be visible, decided to make them v slightly decorative. I think it looks good, will hopefully hold firm, and will scrunch up the sides perhaps 1/2 inch each side, so take most of the spare out. Very happy with the end result. SOme of the seams etc could have been neater, I have definately learnt from the process so the next should be benefitting from this. Alternativeoy, a hook and eye fastening is fine.
What it needs now is a bit of a tidy and neaten job in a few places, and a try on by SB, and then I would iron it and put it away if i was an ironer. Instead I will hang it in the wardrobe and move onto the next petticoat. But, as the first item of clothing I have ever sewn, I am inordinately proud of myself ![]()

Adult version
The Material
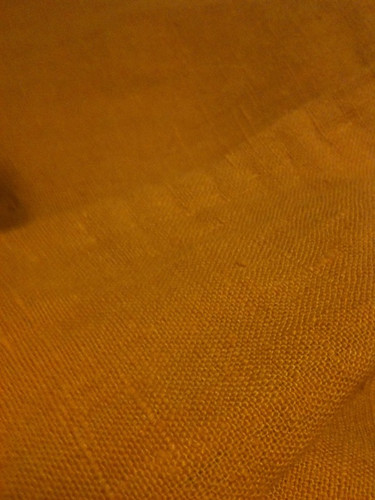
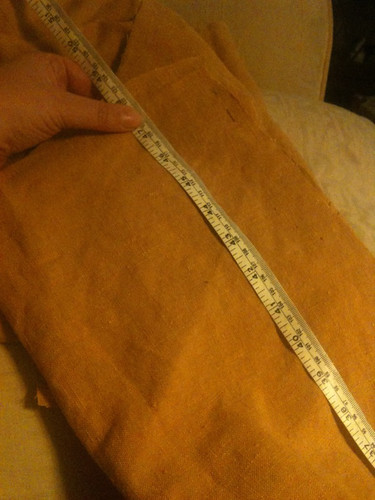
I am using a mustard/turmeric coloured 100% Linen mediumweight. I have washed it and hung it. It doesn’t seem to have shrunk much either. It is more scratchy than the linen shirting, but allegedly it will soften up with use. Having made the whole thing, this material size of 2.9 x 1.5 will easily make any adult size as it has succesfully made a plus size. in fact, 2.5m would be enough if you don’t need side plackets or are smaller and still want them and make it more like the childs one, but would like it reasonably pleated and thus good leg mvt. *actually, 2m would be enough for the skirt even plus size, as it doesn’t have to be so pleated. the pleats are so you can do a good stride, 2m is enough to stride ![]() this could be made as a single rectangle, or piece fabric up to that as linen often in 150cm width*
this could be made as a single rectangle, or piece fabric up to that as linen often in 150cm width*

Measuring Up
this time my material length is only 2.9m by 1.5 . i thought i would go for a x3 mark up on my waist, but my waist is not tiny. another thing is that i am hoping to reduce its dimensions between now and kentwell. so, humming and hawing, i have decided to make the waistband potentially 2 inches each half less than i am [by 4 inches in total] and have a placket each side of 4-6 inches [so 8-12 expansion] and mock pin it and see what that seems like, or whether to reduce the placket bit.I am aiming to make this a size 22-26+ is as this, unfortunately is my size variation. Though if i ever get less than 22 i can celebrate with a new petticoat ![]()
cutting and hemming the rectangles
so today i have cut the 2 main panels at the full material width of 150 being the waist and the length of 120cm. Then from the remaining material I have cut the 2 placket inserts of 20cm by 120cm – I will deal with these later ![]() . This time, perhaps due to less material and it being stiffer, my lines are far straighter and neater, and as expected it has made the whole process easier. Being on my second skirt also easier as I didn’t need to reference back to the tudor costume page. I just hemmed the sides this time, rather than mistakenly the whole lot!! I will hem the bottom at the very end of the dressing process when I have made a kirtle and have an understanding of what length to go to and then update this post! Because it has such a nice selvedge at the sides, I only turned over rather than a proper hemming – again giving me more material.
. This time, perhaps due to less material and it being stiffer, my lines are far straighter and neater, and as expected it has made the whole process easier. Being on my second skirt also easier as I didn’t need to reference back to the tudor costume page. I just hemmed the sides this time, rather than mistakenly the whole lot!! I will hem the bottom at the very end of the dressing process when I have made a kirtle and have an understanding of what length to go to and then update this post! Because it has such a nice selvedge at the sides, I only turned over rather than a proper hemming – again giving me more material.
Preparing the Waistband
I think I was overconfident here, being so happy with my rectangles and plackets. I had decided that I would like a wider waistband than the child one I had made, so ‘cut three inches instead of two’ for the depth, this was entirely wrong!! I had cut 4 for the childs one, which gave an inch waistband, so should have cut 5 to give 1.5 [or 6 if planning to double the material fully] argh!!!! ANyway, I made it 24 inches long [i am sorry i swap between inches and cm all the time] . preparing the turnovers. I did this 2ce, one for front and one for back before realising the mistake. If I had a lot of material i would have recut. However, I know material is going to be tight, so I have stuck with it.
SO doing the folds, I only turned over the edges 1/2 and inch rather than the full to the middle inch, and the ends did fold in an inch, giving me 22 inches by 2 inches, which will leave me with an inch waistband depth again. I hope the linen isn’t too unravelly! Like before I found the middle and marked it, decided to start my knife pleats 3 inches either side and then have the pleats 1 inch apart, so marked these also. I did this twice. Luckilly I realised this in the next step, because of course the back doesn’t want a 6″ smooth bit across the back, and so when I do this again, I will mark at inch steps all across the back band ![]() . I also realised this skirt would be way too big for if I shrunk, so took the waistband down to 20 inches front and back!
. I also realised this skirt would be way too big for if I shrunk, so took the waistband down to 20 inches front and back!
Pinning the Pleats
I have decided that I enjoy pinning ![]() It might be my favourite bit. Making sure that the pleats are crisp and even
It might be my favourite bit. Making sure that the pleats are crisp and even ![]() . Having done the front, I turned to the other waistband and narrowly avoided my other mistake. SO I had 3 inches smooth either side and then knife pleats going away from the centre that went forward 1 inch for the first, back 3/4 inch and then forward 1.75 inches and did a tiny bit of adjustment for the last few pleats. For the back I pleated towards the side [away from the middle] and went forward an inch for the first, back for 1/2 inch and forward 1.5 with some adjustment towards the end. I then looked at them both, and although I liked the look of the front, I didn’t like the look of the back. SO I took out the 1st pleat from the middle on each side and turned them, so I have a box pleat to start with. I think this looks a lot better.
. Having done the front, I turned to the other waistband and narrowly avoided my other mistake. SO I had 3 inches smooth either side and then knife pleats going away from the centre that went forward 1 inch for the first, back 3/4 inch and then forward 1.75 inches and did a tiny bit of adjustment for the last few pleats. For the back I pleated towards the side [away from the middle] and went forward an inch for the first, back for 1/2 inch and forward 1.5 with some adjustment towards the end. I then looked at them both, and although I liked the look of the front, I didn’t like the look of the back. SO I took out the 1st pleat from the middle on each side and turned them, so I have a box pleat to start with. I think this looks a lot better.
edited to add: it is clear that if you want to box pleat a separate placket in, the seam should not be inline with the waistband, but a centimeter beyond this to give the best appearance. ie if you are adding a separate placket, make your main bit protrude beyond the waistband by a centimeter! Even if you are using no extra material as a placket, but having one side protrude beyond before sewing to the other panel, i suggest the seam is a centimetre beyond the waistband
Sewing the skirt to the waistband
This is nice and easy. i have hemmed the waistband onto the pleats on the outside as I think the tudor costume page suggests, and then decided just to hem the other side might be a bit weak, so after hemming the good side, on turning back over I did a running stitch between the pleats and the fold up of the waistband, so invisible from the outside, but hopefully a bit of extra strength. I removed all the pins – this time I had made sure all the heads of the pins were uppermost.
This time on folding over I have only pinned the inside view waistband to pleats. This is partly because if there is any material spare, I may consider adding a ribbon along if I can be bothered! But it is also so that if i do box pleat in the placket, it can be done under the waistband and much much neater ![]() I do like how the pleats are looking.
I do like how the pleats are looking.
The Placket
If anything, this might be the controversial bit of building this costume. But it does seem a very sensible design to allow some flexibility of the waistband size. I am not a tudor costumier, or even amateur researcher. I am just someone trying to make something sensible, comfortable and with a bit of give to it, considering I tend to not fix on a constant size. It seems likely that I will want to use the clothes for more than one year, and no doubt due to the close fitting nature of the kirtle some unpicking and readjusting may need to happen each year. I would like to minimise the bother tho
[ and in fact, in my head I am trying to adapt the kirtle skirt bit too if possible so the adjustment would be to bodice/stitching the 2 bits together]
I digress. I have these 2 bits of 20cm [8 inches] by 120cm and will hem sides and top to take it to 6 inches by 120cm. of these, and then intend to whipstitch them to the front and back to make a side panel on each side, and then consider a small pleat under the waistband on each side, giving it a box pleat appearance and 4 inches of extension from the placket on each side. This should enable it to be easy to get on and off and a varying waist size from 40-48 inch, so a 22 – 26 dress size.
However,if i was thinner, or had material that could have been cut so that I could have constructed the placket bits like in the childs version, this would be far easier!! 2 more bits of material = lots and lots more hand hemming! *in fact I could have done – 1 x 200 or 2 rectangles of 100cm is all I needed*
Whipstitching the sides
*edited to add: it is clear that if you want to box pleat a separate placket in, the seam should not be inline with the waistband, but a centimeter beyond this to give the best appearance. ie if you are adding a separate placket, make your main bit protrude beyond the waistband by a centimeter! Even if you are using no extra material as a placket, but having one side protrude beyond before sewing to the other panel, i suggest the seam is a centimetre beyond the waistband I didn’t do this, but even better, don’t have a separate bit of material, have 1 rectangle of 2 m [or 2 rectangles of 1m each or a 150cm and a 50cm ]*
i have put this higher up in case someone is actually reading this as instructions, so you don’t come to this and have a ‘doh!’ moment like I have. I think the box pleating it looks nicer – and i have made that calculation for the material! But am going to discuss with friends who actually know something about sewing before doing it, as the whipstitched seam doesn’t look so good, or sit so nicely bent back like that. [grr to the possibility i might break a cardinal rule and unpick!] for those that might comment whilst i am deciding, i will put pics here. Box pleating it also takes the placket down to 3 inches each side as well… I have tried it on, v gently over pins and it is still loose enough to have some room to grow, tho i hope to shrink!! And, i can get it on, more importantly ![]()
Making the linen ties
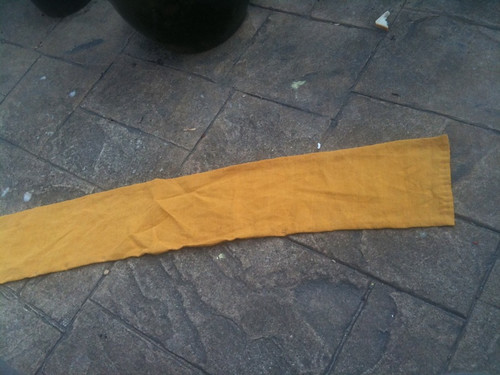
I have the smallest bit of material left! I have enough to make 4 linen ties of 2 inches wide and 19 inches long. These I will fold as per waistband, so the edges are folded into the middle and then the whole thing in half so raw edges buried, and then tack along.
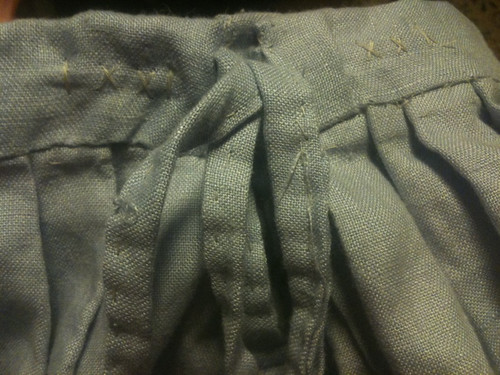
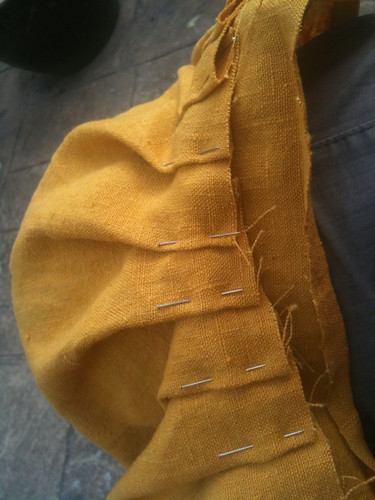
I did make it box pleated, as looks overcomes everything else ![]() and have pins along the seams to hold them neatly in the box, and may iron… you can see both box pleated placket and linen ties
and have pins along the seams to hold them neatly in the box, and may iron… you can see both box pleated placket and linen ties